Setting Up & Using VS Code
Micro-Learning
-- Duration: 2 Minutes
-- Topics Covered:
-- What are Dimensions?
-- Dimension requirements
-- How to access / edit Dimensions
CloudZero has the VS Code + CloudZero extension installation steps in our Documentation. Once you install VS Code and CloudZero’s extension, authenticate to CloudZero and download the latest Dimension definitions. Remember you must have “Organizer” permissions to download Dimension definitions.
If you’re not sure what to do or don’t know where the Command Palette is, you can always access it by either clicking on the gear icon in the lower left corner of the screen or clicking into the search box at the top and typing a “>” character.

Step 1 - Authenticate To CloudZero
Once you’re in the Command Palette, you can type “CloudZero” to see all the commands available to you at that time. The 1 command that will always be available is the “CloudZero: Authenticate With the CloudZero Platform” command.
Step 2 - Download The Latest CostFormation To Edit
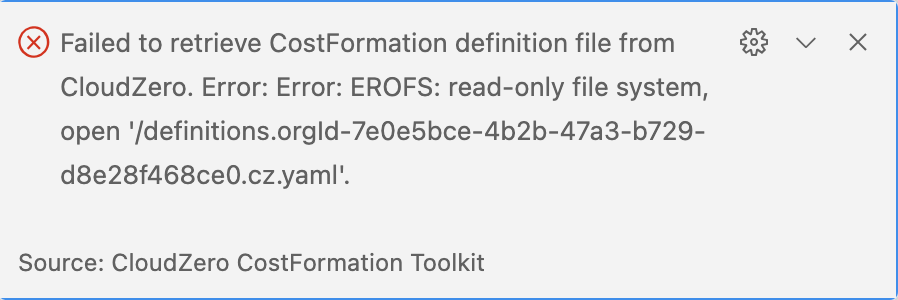
After you authenticate to CloudZero, you can run the command "CloudZero: Download Latest CostFormation". When you download your CostFormation, you'll have to save it somewhere on your local hard drive. Make sure you select a location that you have write permission to. If you see the following error, you need to choose a different location:

Help Shortcut - "Auto-Collapse" Dimensions
If you already have CostFormation built, a helpful shortcut to remember is the “auto-collapse” dimensions shortcut within VS Code. Imagine you have 2,000 lines of CostFormation across 15 dimensions. Auto-collapse would make it so all the CostFormation “collapsed” within each Dimension ID and you would just see the Dimension ID. Then it’s easy to find the Dimension you want to review/edit and expand it.
Make sure your cursor is on the word Dimensions at the top of the file, then:
- OPTION 1 - Shortcut = [command] + [k] + [2]
- OPTION 2 - From the Command Palette, you can use the command “Fold Level 2”
Updated 11 months ago

